Monday 29 April 2013

Legs are cut

After a very relaxing weekend off with just the wife and no kids, I decided it was time to get this table a little closer to complete.  I wanted to at least finish welding the table top frame, cut the legs to length and cut the bottom off of the other 3" x 1 1/2" leg attachment tube.  Ohh, and I finished editing the video of the plasma cutting from last week.


This video was really a trial run for many things.. video camera placement, speed effects, plasma cutting with a guide on a make-shift welding table/positioner (ie. drill press vise)  And I noticed that at some point the sound became unsynchronized with the video... like I said, trial run.

So, I did what I set out to complete today...
Finished cutting the legs and attachments


Then finished up the welds on the frame.  Think I'll stick with the TIG seeing that I went to get the argon tank refilled... and I need the practice.  Most of the welds turned out pretty good.  I even "walked the cup" a little on the fillet (inside corner) welds  I really need to practice the outside corners though!


So, that's it until next time when I drill the holes in the legs, and just maybe start putting things together!

Thursday 25 April 2013

A little progress

Didn't get a whole lot done today, but progress is progress. And I didn't screw up any of my cuts so that outta count for at least double!
I started with a little rust removal on the 3 x 1 1/2 tubes. I picked up a sanding conversion kit for my electric angle grinder a while back and this would be the first time using it.  It took the surface rust off with no problems and left a nice smooth, paintable surface.
Then I turned once again to the plasma cutter to take a large chunk of the bottom off. This will be where the legs attach into. It was a little bit of a difficult place to cut because I wanted the cut right on the corner of the rectangle tube.. but what ended up happening is I cut slightly up the side wall, which is the next best thing.  After cutting, I ground down the edges and tired to get it as flat as possible.
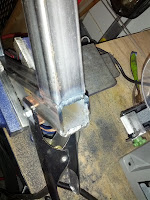
And that's all the time I had for today. I took some video of the plasma cutting.. I'm just editing it now and will put it up later. But for now, here's a pic of my now shiny rectangle tubes.

Tuesday 23 April 2013

First things first - where's my welding table?

It wasn't long after starting the BBQ that I realized there was something missing from my shop that would make this project go smoothly.  That something is a descent table to weld on.  I already have a work bench, which is already quite cluttered with a vise, and grinder, and drill press, and some other junk... so instead of re-organizing all of that, I decided I'd build a portable folding welding table.  It didn't take long to find plans for this exact thing on the Miller Welding website.  And since I had some extra 1/4" plate from when I cut up the pieces for the firebox, I thought to myself, this will work out perfectly.

First thing the plans call for is to cut and weld the 1 1/4" square tubing for the base of the table top.  I had two options for cutting these pieces.. cut-off disc in the angle grinder, or plasma cutter... PLASMA CUTTER every time baby!  Would be nice to pick up a good used metal band saw one day tho.  Maybe if I build a second welding table, someone might be willing to trade for one.

Well, got the tubing all cut and edges ground flat and it's time to weld.  Again, two choices... stick or TIG?  Think I'll practice some TIG today.  And since I'm running really low on argon, I'll just weld until I'm forced to stop.

Got the pieces all fit together, fusion tacked each of the pieces, and then ran some beads with some ER70S-2 rod.  It had been some time since my last TIG practice, so some of the welds turned out a bit globby, but all in all, I was happy with the results.  I was able to get one side welded up before running out of argon.  You can see the last two welds on the right where the steel started to oxidise because there was no shielding gas.


So, no more argon, what else can I do today?  Perhaps cut the two pieces which attach to the bottom of this frame in which the legs will be bolted to and pivot in.  Again, plasma made quick work of these pieces.


This is where they will be welded in place.


Think I'll be grinding some rust off of these the next chance I get as the TIG process certainly won't like that.

That's all I had time for today.  It was nice and sunny out so figured I'd take the car out for her first run of the year.


Sunday 14 April 2013

First cuts

Finally the snow from that freak snow storm that passed 2 days ago has melted from on top of the steel sitting in my driveway.  It was actually quite a nice day when the sun was out, hovering at around 10, so I took advantage of this to chop up these steel plates.  I have a 325lb 1/4" x 48" x 96" plate and a 200lb 1/8" x 48" x 120" plate (or sheet?)... plus a sheet of expanded metal.. that grate stuff you see on metal walkways.. and some 28' of angle iron... lots of raw material.. figure I'll draw this out so I can do the least number of cuts and waste the least amount of steel, because I have a few other projects I want to use this steel for.

I picked up a cheap, made in China, 3-in-1 welder/plasma cutter a few months ago, and although I've cut and welded up a few small things, this will be the first big test for this machine.  To be honest, I'm a little nervous.  I can always resort to using the angle grinder with cut off wheels, but that's going to be really long and noisy and dusty and crappy!  So here's my setup.. got the tig/arc/plasma machine on the right, some compressed air for plasma cutting next to that and a tank of argon for the tig on the left...


I didn't get any footage of the actual cutting, but I promise I'll get some when I'm cutting the individual pieces.  The goal for today was to just get these huge sheets broken down a little so I can fit them in the garage.

We (my father in law and I) got off to a little of a rocky start with some electrical problems.  This machine supports both 110V and 220V, and like I said I haven't done any long cuts like this, so I've been using 110V since I bought it.. mainly because I don't have 220V run into the garage. So I started the cuts today while plugged to 110V.  This lasted all of 15 seconds and the breaker tripped.  So I decided to hook up my make-shift 30 amp 220V extension cord to the dryer outlet in the basement.  Ahhhh, much better!

So I had 3 x 4' cuts on the 1/8" and 3 x 4' cuts on the 1/4".  The 1/8" was on top, so I tackled this one first.  I clamped on some of the angle iron I had to act as a guide, and after about the first 5 or 6 inches I found a nice groove and started making some pretty nice and clean cuts.  And once the 1/8" was banged out, I went to check on my chicken that I'm smoking up today in my old smoker...


Looking good!

So, now the 1/4".  I knew this was going to be a completely different ball game.. I'm going to have to travel slower, the torch movement is going to have to be smoother, and have to turn the amps up on the plasma cutter.  And then is started to rain!  Crap!  Pack everything into the garage quick!  And then as soon as it started, it's over.  Quick, take everything back out of the garage again.

Okay, 1/4".. after a couple of tweeks on my technique, we're cooking.. with plasma!  I got 2 pieces of plate chopped up into manageable pieces, basically so I can get it stacked nicely inside the garage and I'm going to call it a day!  Hope you enjoyed the read.


Ohhh, and the chicken was great!


Saturday 13 April 2013

BBQ Pit Plans

So after several months of research which included countless nights reading blogs and forums, and talking with people about what they liked and didn't like about their smoke pits, I've finally finished the CAD plans for my pit.

For a few different reasons, and I will get into them, I've decided to go with a box design instead of a cylinder/tank design.  First off, I don't know if it was just me, but I couldn't seem to find a tank with the dimensions and wall thickness I was looking for on Craigslist or Kijiji.  I'm sure if I would have waited I would have eventually stumbled upon one, but this second reason is the one that cemented my decision.

It's not that I have a small back yard, but most of my back yard is taken up by the pool, kids toys, deck, etc... so space is a little bit of a concern.  Now most of the tank designs I've seen have one large tray, naturally in the middle where the tank is its widest, which is my opinion leaves a lot of wasted space inside.  Some have no doubt realized this and cut their tanks in half to add a foot or 2 of metal to make it elliptical and taller, which adds a multitude of complexity.  And even after all of that expanding is done, then you still have all the weird round surfaces to hook up the firebox and chimney too.. NO THANKS!

I've purchased a couple of different off the shelf smokers in the past, and both had design features that I didn't like.  My first smoker was (and still is) a horizontal offset smoker.  It continues to be a decent smoker if used properly, and in fact I'll be smoking some chickens tomorrow in it.  The 2 major problems with this unit is that the walls are really thin sheet metal, which makes the temperature hard to sustain, and it's not a reverse flow horizontal offset, which means the heat from the firebox enters the cook chamber directly and it tends to dry the meat if not watched and rotated and flipped and basted and then rotated again!  So lesson learned.. Reverse flow = good!

My second purchased smoker WAS a vertical water smoker.  It's a pretty funny story which involved copious amounts alcohol, some good friends, and a flaming vertical water smoker.  Luckily we were able to pull the brisket and pulled pork quickly from the inferno and it still turned out pretty amazing.  It turns out, the water pan in the vertical water smoker needs to be constantly filled with water.  At some point during the night it had all evaporated and then started to fill with fat drippings from the meat.. and when we stoked the fire in the morning... GREASE FIRE!!

Which brings me to my design.  What have I learned?  No curved surfaces, reverse flow, keep the flames away from the food and get the grease quickly moved out of the way.  Ohh ya, and copious amounts of alcohol are awesome with BBQ  :)  So, let me throw up some CAD rendering of the design..


As you can see, it's boxy and full of rack space.  Everything has been spec'd out according to Feldon's BBQ Pit/Smoker Build Calculator http://feldoncentral.com/bbqcalculator.html  It's gonna be one heavy beast!  The firebox is 1/4" plate steel and smoke chamber is 1/8" plate steel.  Got the raw materials all bought and delivered yesterday (all 550lbs) and I'm ready to start cutting pieces tomorrow.