Thursday 6 March 2014

Porsche Fabspeed Exhaust

I've owned my 1980 Porsche 911 for over 13 years.  The one thing I've always wanted to do is put a performance aftermarket exhaust on it.  Well, last week I drove to North Philly to the Fabspeed Motorsports fabrication shop and picked one up.  Why drive all the way to Philly you ask? (as did the customs agents on both sides of the border, the bar tenders in New York that I was trying to pick up, and all of my other friends that don't understand cars) Because these guy's imagine, fabricate and test all of their products right in that shop, and the cars that were in the shop that day getting fit for exhaust proves they know what they are doing.

As soon as I walked through the doors, I knew I was in the right place (and in the wrong job)  Some of the owners cars were on display in the front lobby. Factory 930 slantnose in red, raced out 993 RS replica in white and Ferrari 458 in red were front and center, all fitted obviously with Fabspeed.


So, fast forward to the weekend when I started to install it on my car.

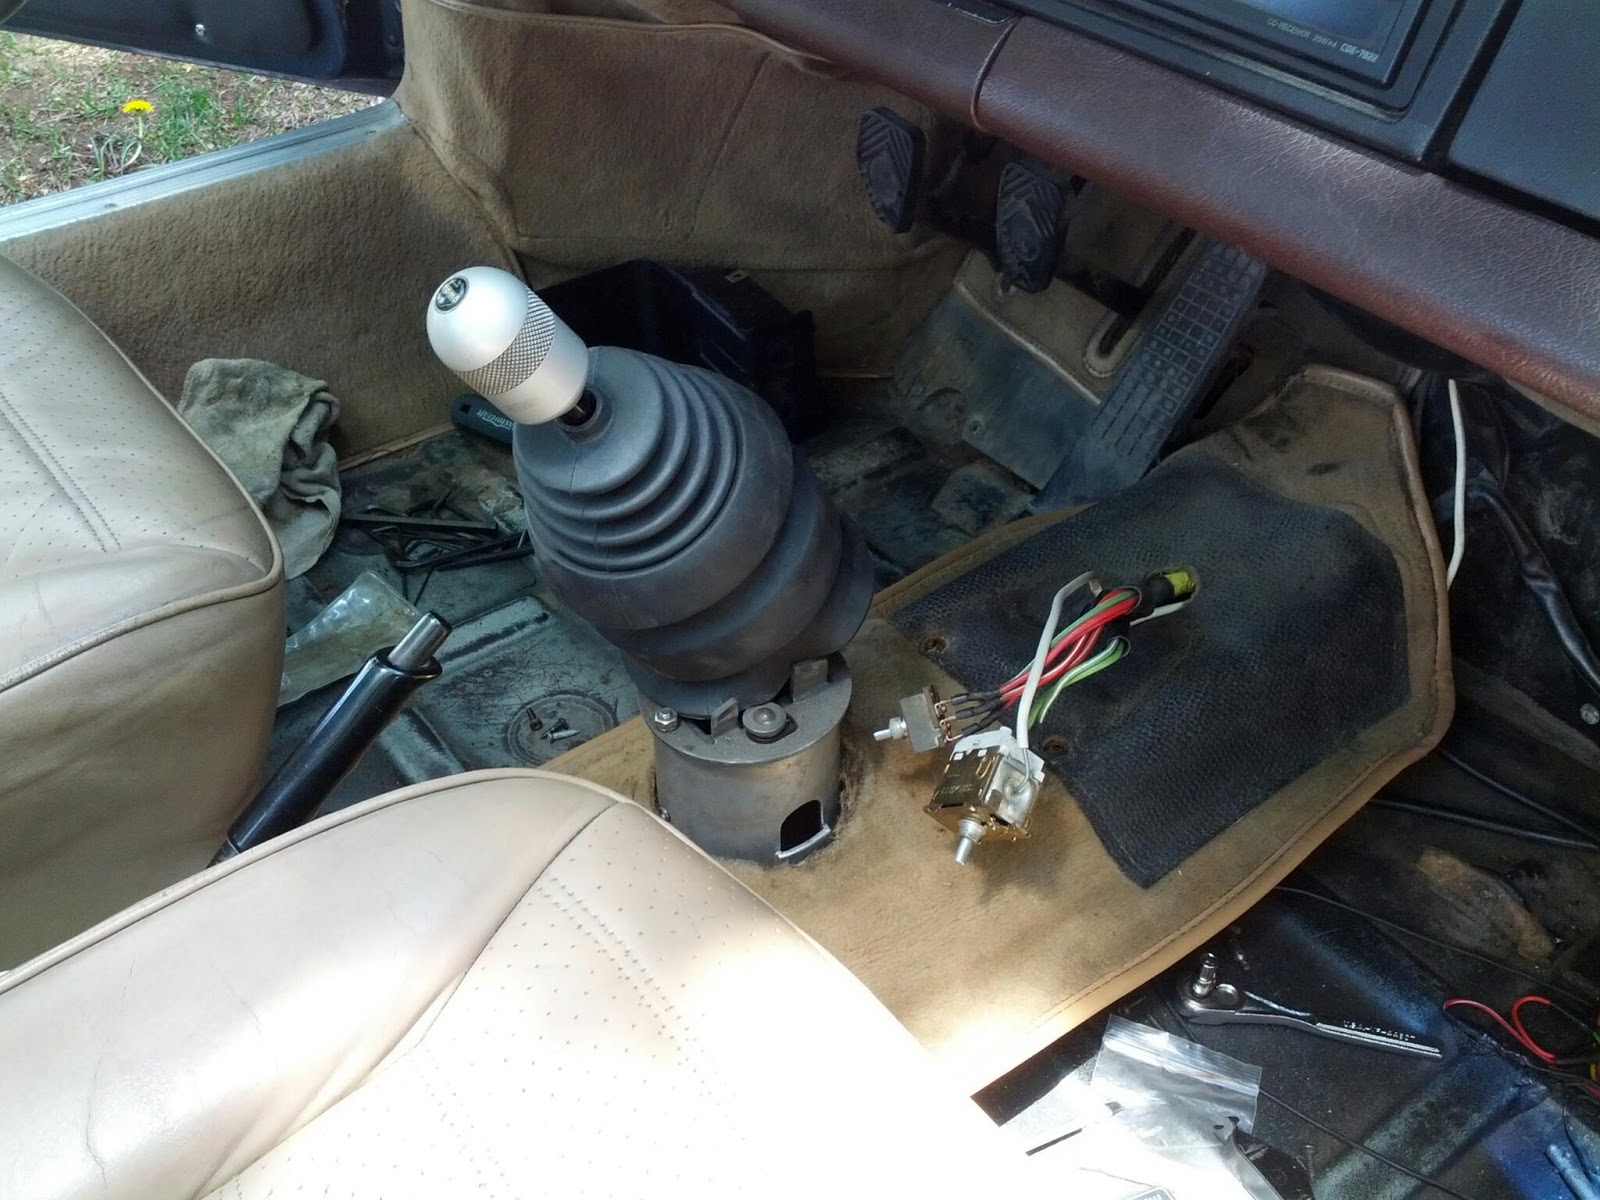
Step one. Remove old muffler. Sounds easy. Nope. 13 years of bolts rusting and heat cycling meant there was no way the nuts were coming off without a fight! Like a naive optimist, I thought a little penetrating oil and heat and elbow grease would do the trick.  I quickly gave up on that and opted for the grinder and air hammer to get the job done!  Here's what's left of them.


So, with the bolts out, just snipped the straps that were holding the muffler to the bracket (wasn't even going to waste my time with trying to undo the bolts) and off it came.


Looks like a hot dog!  Not nearly as nice as what I'm about to put on.

With the old muffler off, time to do some inspections. And good thing too! Found this disaster waiting to happen.

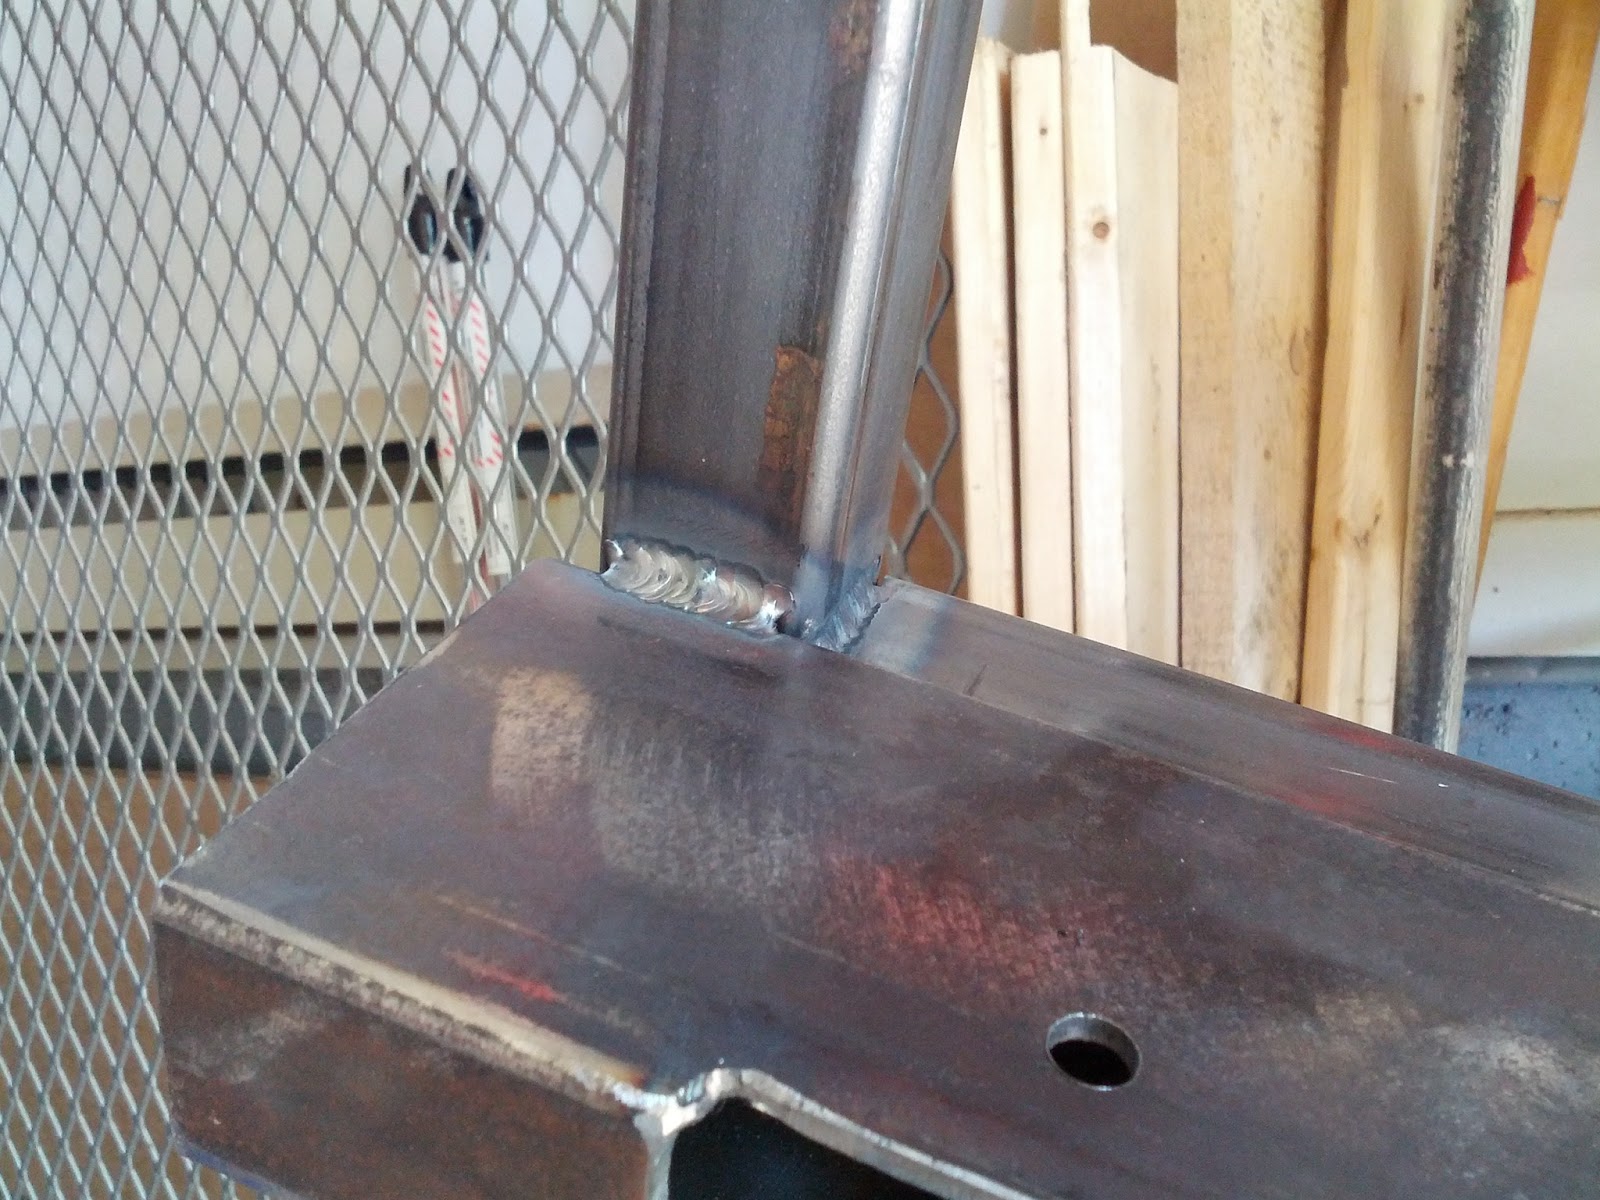
Cracked motor mount bracket. If you look closely, you can see whom ever tried to repair this first, just tack welded a little strip of sheet metal to both sides of the crack at the top.  LAME!  Gotta weld that shit.


It's not perfect, but it'll do for now.. until I drop the engine next winter for major service and do a proper repair while it's off the car.

So, they included this nice stainless steel bracket which the new muffler is supposed to attach to, and it's supposed to bolt to this motor mount bracket.. I don't see any holes.. do you see any holes?  After checking the 'ol interwebs, I found a nice picture of this piece in it's entirety (which I marked up) and realized the heat exchanger tube is in the way hiding the holes.  Yet another thing I have to take off!


Se, with everything out of the way, I was able to get the bracket installed.


Now, the rest should be like pie!


I'll post some pictures of the entire behind when I finally get it out of the garage if spring ever arrives.. And of course some video of how it sounds when I start it up for the first time in the spring.

Thursday 30 January 2014

BBQ Smoker - Firebox

Well folks, it's been a really long time since I've written anything in the 'ol blog.  Last update was from way back in early summer when I was changing my motor mounts on the 911 and broke the engine mount bar. Just a quick update on that, I was able to tap the threads on the new rennline mount bar and got a set of replacement bolts and the car was solid all summer.  Now it's parked in the garage ready for some winter projects, but that's not the point of this post.

I'd like to switch gears into my BBQ smoker project.  With spring fast approaching, I need to start busting a move on this one.  It was really the project that made pick up the welding gear and get me into this hobby. The first week when I had received the steel, I cut it into manageable pieces, but then it just sat against the wall, lonely and cold, until winter started this year and I had more time to dedicate to it.

The first part of the smoker I decided to work on is the firebox. This is the part of the smoker where the fuel burns (wood or charcoal) and produces the smoke which then makes its way into the smoke chamber.


Using 1/4" mild steel for this part is the key to the whole build.  It might take a little while to warm this us, but once it's hot, the temperature will remain very steady! The dimensions of this box is roughly 17" cubed.  Big enough to use chopped hardwood.

I started by cutting all of the pieces to their proper dimensions. At first I started using the plasma cutter.  I thought it would make quick work of these cuts, but I was soon shown otherwise. The cutting torch I have is rated only to 40 amps and as soon as I went even a couple of amps above that, the electrode started melting. And 40 amps was only giving me enough juice to get severance, not a clean cut.

So, not wanting to have really crappy looking cuts, I looked for another solution. I had an angle grinder and some cut off disks so put them together and started cutting away. It started off going alright, until my hand started to heat up... and I mean A LOT! My grinder was biting the bullet! It was arcing inside the handle so I dropped it like a hot potato. Great, now I had no options. Or did I?

I had seen some redneck videos of rednecks cutting steel with reciprocating saws on the 'ol interwebs. So, being half redneck, I ran to home depot, bought some good quality metal cutting blades, brought them home and tried it out for myself. And you know what?!? It's not the fastest cutting device, but cuts very clean and straight! So, I was able to continue.

Once all the pieces were cut, I needed to grind down the edges of some of the poorer plasma cut pieces. I picked up a Milwaukee 4 1/2" angle grinder on sale at Home Depot (and so far have been really happy with it) and cleaned up the pieces a little.

Now comes the more fun part, welding some of the pieces together. I opted to weld the seams from the inside with stick welds (aka shielded metal arc weld - SMAW)  TIG welding the outside seams would end up looking really nice, but would use up a whole lot of argon. I didn't take a whole lot of pictures during this process, so you'll have to live with these poor quality pics.


Once I had all 5 sides welded up, I took a square measurement and was only off by a tiny bit.  Well within tolerances! So now it's time for the hinges and the door.  I made the hinges out of some 1/8" x 1" flat bar cut into 2" long pieces and drilled a hole through the center on one end of each.

I then took out the TIG torch to attach these to the door and box.  I don't have much argon left so I'd have to be quick and efficient if I don't want to have to pick up another bottle before the end of the day.


And lastly I need to weld an end piece on the hinge rod, so it doesn't slide right through the holes. For this, just some round stock slightly smaller than the holes drilled for the hinges, and some 1/8" x 1" flat bar for the end cap.

And this is how it turned out.  Pretty happy if I do say so myself!


Friday 7 June 2013

Time to install the Rennline engine mount cross bar

Well, today was an eventful day.  I received my new Rennline stainless steel engine mount cross bar to replace the standard flimsy kaka bar that came on the 911, and took the day off to install it.

A little back history for you.  I was replacing the tired old motor mounts with some new sport mounts that came standard on the turbo, and while removing one of the main bolts, the bar cracked and bent at the narrowest point.


So, now that you know what's going on, back to the story.  The new bar I received is a real work of art.  This is the same bar that came on the prized 1973 Porsche 911 RSR.  I had the option of brushed stainless or painted red, and I thought the stainless would look nicer and be easier to clean.


The install seemed pretty straight forward, jack under motor, undo old broken part, install shiny new part, lower jack, clean up tools, drink beer.  Well, things didn't go according to plan, except for the first and last steps.

After completely breaking off the old piece, which was intentional, I was now ready to remove the 4 bolts which hold the bar to the motor.


As I'm always scared to severely cut myself (largely in part because seeing my own blood in large quantities makes me want to pass out) I took great care in positioning my hands and using restraint in... WOOPS, hand slipped and I sliced the top of my knuckle off.. CRAP.. on the first bolt too.  Well, better hurry up and wash this up and evaluate the damage before I end up taking an early unplanned siesta!

Hrmmm.. I can see cartilage.. is that bad?  I need to lay down.  Deep breaths... okay I'm good.


Decided to throw a band-aid on it and continue working, as my engine is precariously being held up by a hydraulic jack.


Hey, souvenir!


This time I used a much longer ratchet and put on gloves and was a lot more successful.  With the old piece completely detached, I was able to wiggle it out of the engine bay with little problem, but then it dawned on me that the old piece is a little shorter(because the end is broken off)  Now I'm starting to panic a little.  I don't think I'll be able to get the new part on without dropping the motor.  I'm not prepared to drop the motor today, or really any other day for that matter.

What I ended up having to do was lowering the motor about 8 inches, and I was able to wrestle the new piece in, with a hammer.  I'm almost done, I can see the finish line.  All I need to do is connect the bolts.  Why do I feel like Arya Stark in the Game of Thrones?

First bolt, dropped it.. it's somewhere under the crankshaft pulley.. CRAP!  Go get a magnet and fish it out.  20 minutes later finally get it and get the rest of the 4 engine bolts on.

Now onto the mounts. I get the passenger side on no problem.  Torque it up and move onto the driver side.  Start to tighten up the main bolt and as its getting tight, it starts to get looser, and is just spinning and spinning.. WTF?  The brand new bolt has stripped.  I was able to remove it and try another, but I'm already thinking that the threads on the nut are probably screwed too.  Yup, surely enough, I strip another bolt.


I have one more bolt left, but I think I'll hit up a buddy of mine to borrow his tap and die set to clean up the threads on the nut.

It'll have to wait for this weekend.. because I give up and it's time for beer!

Sunday 19 May 2013

Some work on the p-car

After having driven the 911 a few times this year, I decided it was time to start my to-do list of little projects. Some things that have been bothering me are the shifting and the dirty state of the engine.

The shifting I've already determined to be caused in part by the shift coupler bushing which sits between the 2 back seats in the tunnel. It has discernible play in the linkage which cannot be helping the shifting.


So with the tunnel cover off I was able to remove the coupler and indeed I was able to jiggle the shaft in the bushings quite a bit. 

I had ordered the bushing kit last year so now it's just a matter of pushing the pin out, removing the bushings, pressing in the new bushings and finally pressing in the pin.


Now the coupler is much tighter! Maybe too tight.. but I'm sure over time it'll loosen a little.

So, before connecting everything up in the back and adjusting the linkage, I also have the bushings in the front. There's the ball cup and the shaft bushing under the center console which take a little more work to get at than simply pulling the rug back and undoing 4 screws.


With the console off and the shift tower disconnected, I was able to see the front bushings are in good shape. I recall I changed the ball cup when I installed the short shift kit some 10 years ago, but other bushing I wasn't sure of.


After an hour getting everything undone, it's time to put everything back together.. hope I don't end up with spare parts :)

Now it's time to start the shifter adjustment. Being the first time I'm doing this procedure, I'm expecting the worst and hoping for the best.  The procedure goes something like this:

1. With the shift coupler disconnected, put the transmission selector shaft in neutral and turn clockwise when facing the front of the car.
2. Move the shift lever to the left (towards the driver) and put the lower part of the lever vertical (90 degrees from level when viewed from the side of the car)
3. Tighten the shift connecting rod to the coupler.
4. Check that all the gears can be selected. Check for even distribution of travel in the shifter when selecting different gears. Ensure there is a little play in the selector shaft when in 5th.

With all that done I went for a drive. Things seemed okay but I didn't have the space to stretch the legs of all the gears. But, the travel of the shifter between 1st and 2nd isn't even, so I'll have to go back and fix that later.

But, before I ran out of time, I wanted to de-grease the engine and have a chance for it to sit in the sun and dry.

With newer cars, all of the electrical in the engine bay is weather resistant, but my car is neither new nor weather resistant. So out come the plastic bags to cover the air intake, distributor and fuse / relay panel.
Now for a liberal spraying of Gunk engine cleaner on 13 years of road grime and oil leaks. 

While I'm letting this work it's magic, I'll take the time to properly glue in place the headlight seals that I hadn't done properly last fall.


That should be enough time soaking.. let's get out the old tooth brushes and start brushing. You'll forgive me for not having pictures of this process as I had dirt and grease and solvent on my hands and arms.  But I did get some of the finished product.


That's all I had time (or energy) for today. I didn't get around to replacing the motor mounts. I guess it'll have to wait for Monday, which is a holiday :-)


Saturday 11 May 2013

It's standing under it's own weight

I guess I'm pretty much finished the table..


..well, except for some of the finer details, such as the top piece and maybe paint.

The night before last I finished welding the leg cross members on and any other corners in the frame that I had forgotten.

Then last night I started by sectioning the 1" flat stock into the pieces which hold the legs in position.  I figured I would try out the cut off disc in my angle grinder, as I didn't need the plasma cutter or welder for anything else and didn't want to string out all the cables for a couple of cuts.

I didn't know this at the time, but it might have almost been a safer bet to actually use the plasma cutter.  You see, when I was making one of the cuts, the disc violently dug into the piece being cut and jerked the angle grinder out of my hands.  Luckily I didn't try to recover the fumble, but instead tried to get every appendage that I care about out of the way as fast as possible and avoided a catastrophe!  Only thing that was destroyed was the new cut off disc as the grinder hit the cement floor... but I couldn't care less.

So, with all of the flat bar cut, I clamped the similar lengths together, center punched where the holes would go on each end, and drilled them on the drill press.  This is flying faster than I expected at this point and quickly realized that my table would be standing in a matter of minutes.

I retrieved by bag of bolts, determined which pieces needed to be bolted to which holes and started to piece it together.


At this point, I encountered two things which would need to be worked around.  First, there must be a set of holes in some piece which aren't completely even with the rest as my front legs have a bit of a twist in them and I need to pry up on one side to get the flat bar attached.  Second, when I fold the table up, the middle bolt on the bottom pieces of flat bar hits the legs.. so I need to add in some washers on the other side of the pieces to give it some room to play.  Think I might eventually cut off the head of the bolts and weld the stud to one of the pieces, so I don't need all those washers.


Then finally, the last thing I did last night was to grind down the welds on the table top frame to receive the 1/4" table top, when I get around to cutting it.


And then I sat on the table to test it out!!!

Sunday 5 May 2013

It's starting to look like a table

Today was a very productive day.  When I started I had a bunch of individual pieces, all cut to length and drilled, but it looked nothing like a table.


I started by welding the outside corner edges on the leg brackets to the table top base.


I don't want to run a long bead of weld at this point so that the whole frame doesn't start to warp.  So I continued with some 1 inch long welds along the sides for extra strength.  


And then closed up the inside corner joints.


Well, the base is done.  I guess I can try the legs and see how they fit.  I ran to the hardware store yesterday and got the bolts, nuts and washers I needed, with the exception of the nylon threaded lock nuts.. for some reason they didn't have any for the sizes I needed.  Ohh well, some lock-tight should do the trick.


Lookin good, right?!  Everything fits pretty good and is pretty well straight.  Pretty happy about this!

Now to fuse the legs together. I still need to cut to length the 2 pieces for this task.  I wanted wait until it was all together to make sure the length was accurate.  Two 17 1/4" pieces, coming right up.


Gotta admit, I'm getting pretty handy with the plasma cutter!  The cuts were nearly perfect.. the only thing that got me this time was when I switched from TIG to Plasma, I forget to switch the foot control switch off, so the plasma cutter would start weak and then just peter out.

So I have only enough time before my daughter gets up from her nap to weld in one of these leg.. 


See, looks like a table!  The few remaining things now left are to weld together the other pair of legs, cut up and drill  the 1" flat stock that will hold the front and back legs together and allow them to fold, cut the table top from the 1/4" plate I have left over, and weld it to the frame.  I might just be able to get this done in one more evening of work.