Sunday 19 May 2013

Some work on the p-car

After having driven the 911 a few times this year, I decided it was time to start my to-do list of little projects. Some things that have been bothering me are the shifting and the dirty state of the engine.

The shifting I've already determined to be caused in part by the shift coupler bushing which sits between the 2 back seats in the tunnel. It has discernible play in the linkage which cannot be helping the shifting.


So with the tunnel cover off I was able to remove the coupler and indeed I was able to jiggle the shaft in the bushings quite a bit. 

I had ordered the bushing kit last year so now it's just a matter of pushing the pin out, removing the bushings, pressing in the new bushings and finally pressing in the pin.


Now the coupler is much tighter! Maybe too tight.. but I'm sure over time it'll loosen a little.

So, before connecting everything up in the back and adjusting the linkage, I also have the bushings in the front. There's the ball cup and the shaft bushing under the center console which take a little more work to get at than simply pulling the rug back and undoing 4 screws.


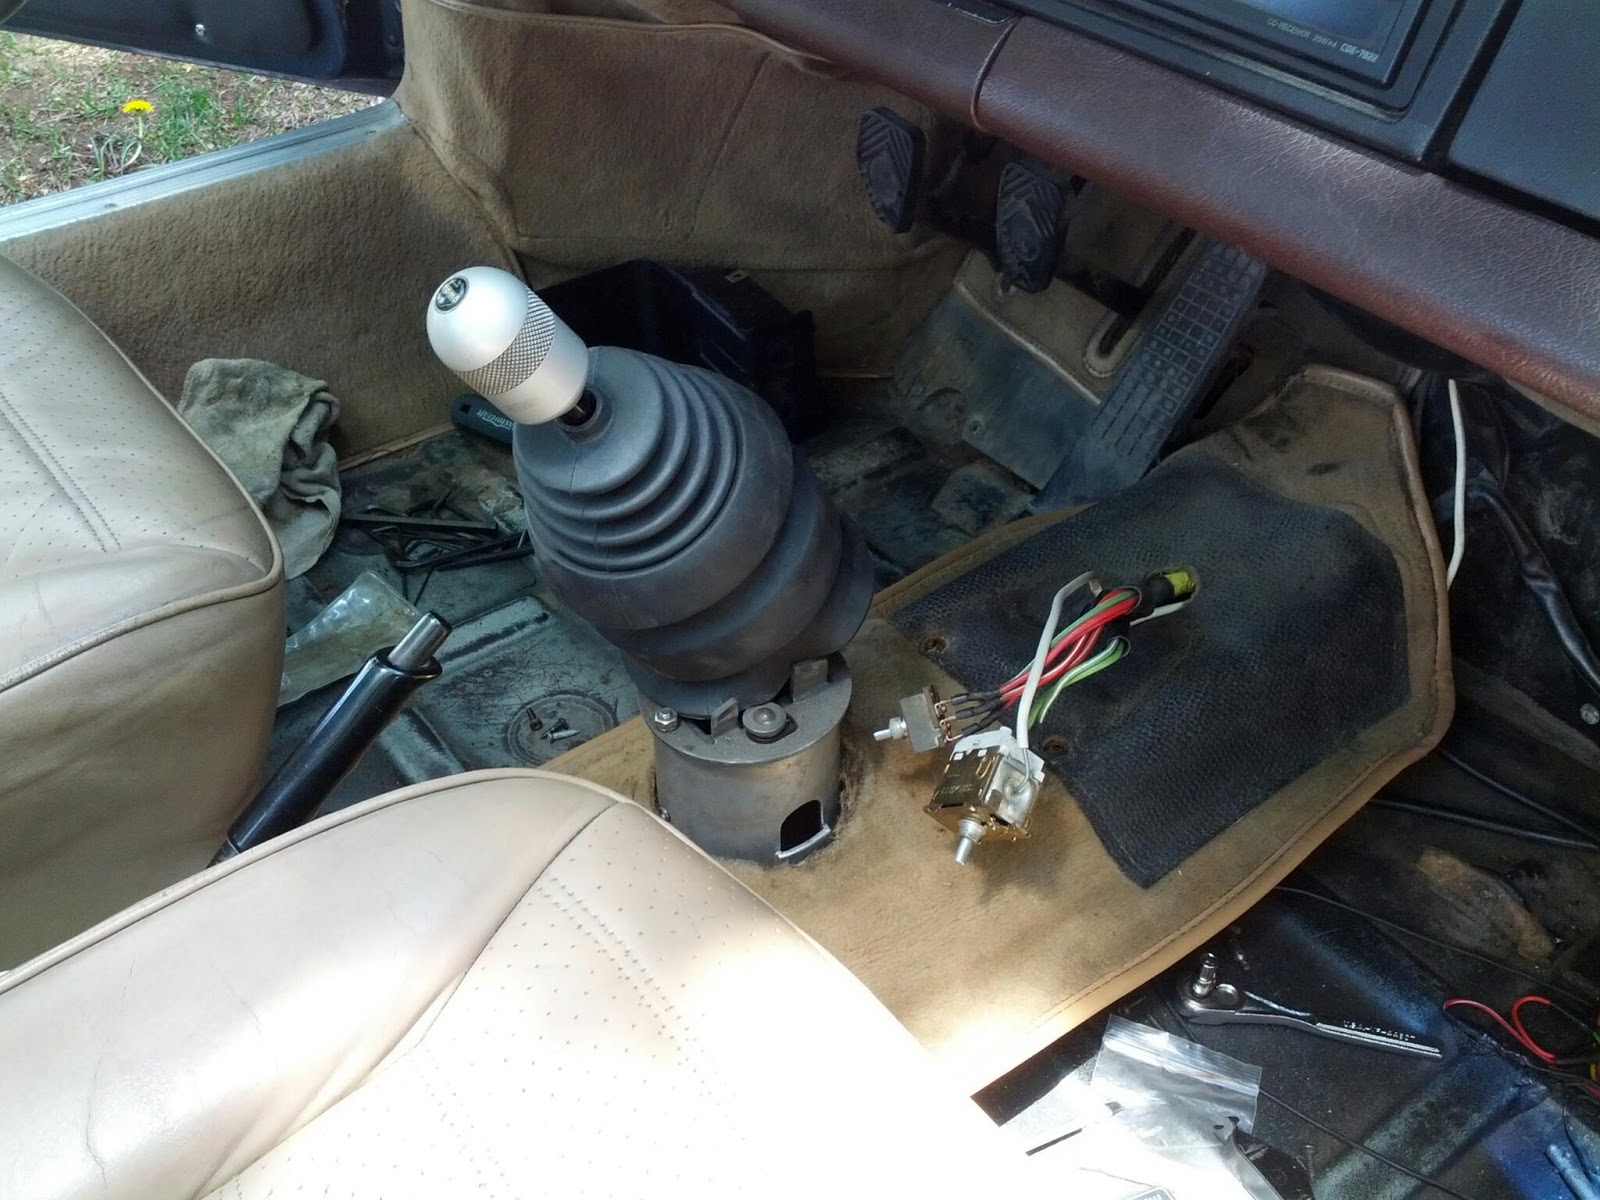
With the console off and the shift tower disconnected, I was able to see the front bushings are in good shape. I recall I changed the ball cup when I installed the short shift kit some 10 years ago, but other bushing I wasn't sure of.


After an hour getting everything undone, it's time to put everything back together.. hope I don't end up with spare parts :)

Now it's time to start the shifter adjustment. Being the first time I'm doing this procedure, I'm expecting the worst and hoping for the best.  The procedure goes something like this:

1. With the shift coupler disconnected, put the transmission selector shaft in neutral and turn clockwise when facing the front of the car.
2. Move the shift lever to the left (towards the driver) and put the lower part of the lever vertical (90 degrees from level when viewed from the side of the car)
3. Tighten the shift connecting rod to the coupler.
4. Check that all the gears can be selected. Check for even distribution of travel in the shifter when selecting different gears. Ensure there is a little play in the selector shaft when in 5th.

With all that done I went for a drive. Things seemed okay but I didn't have the space to stretch the legs of all the gears. But, the travel of the shifter between 1st and 2nd isn't even, so I'll have to go back and fix that later.

But, before I ran out of time, I wanted to de-grease the engine and have a chance for it to sit in the sun and dry.

With newer cars, all of the electrical in the engine bay is weather resistant, but my car is neither new nor weather resistant. So out come the plastic bags to cover the air intake, distributor and fuse / relay panel.
Now for a liberal spraying of Gunk engine cleaner on 13 years of road grime and oil leaks. 

While I'm letting this work it's magic, I'll take the time to properly glue in place the headlight seals that I hadn't done properly last fall.


That should be enough time soaking.. let's get out the old tooth brushes and start brushing. You'll forgive me for not having pictures of this process as I had dirt and grease and solvent on my hands and arms.  But I did get some of the finished product.


That's all I had time (or energy) for today. I didn't get around to replacing the motor mounts. I guess it'll have to wait for Monday, which is a holiday :-)


Saturday 11 May 2013

It's standing under it's own weight

I guess I'm pretty much finished the table..


..well, except for some of the finer details, such as the top piece and maybe paint.

The night before last I finished welding the leg cross members on and any other corners in the frame that I had forgotten.

Then last night I started by sectioning the 1" flat stock into the pieces which hold the legs in position.  I figured I would try out the cut off disc in my angle grinder, as I didn't need the plasma cutter or welder for anything else and didn't want to string out all the cables for a couple of cuts.

I didn't know this at the time, but it might have almost been a safer bet to actually use the plasma cutter.  You see, when I was making one of the cuts, the disc violently dug into the piece being cut and jerked the angle grinder out of my hands.  Luckily I didn't try to recover the fumble, but instead tried to get every appendage that I care about out of the way as fast as possible and avoided a catastrophe!  Only thing that was destroyed was the new cut off disc as the grinder hit the cement floor... but I couldn't care less.

So, with all of the flat bar cut, I clamped the similar lengths together, center punched where the holes would go on each end, and drilled them on the drill press.  This is flying faster than I expected at this point and quickly realized that my table would be standing in a matter of minutes.

I retrieved by bag of bolts, determined which pieces needed to be bolted to which holes and started to piece it together.


At this point, I encountered two things which would need to be worked around.  First, there must be a set of holes in some piece which aren't completely even with the rest as my front legs have a bit of a twist in them and I need to pry up on one side to get the flat bar attached.  Second, when I fold the table up, the middle bolt on the bottom pieces of flat bar hits the legs.. so I need to add in some washers on the other side of the pieces to give it some room to play.  Think I might eventually cut off the head of the bolts and weld the stud to one of the pieces, so I don't need all those washers.


Then finally, the last thing I did last night was to grind down the welds on the table top frame to receive the 1/4" table top, when I get around to cutting it.


And then I sat on the table to test it out!!!

Sunday 5 May 2013

It's starting to look like a table

Today was a very productive day.  When I started I had a bunch of individual pieces, all cut to length and drilled, but it looked nothing like a table.


I started by welding the outside corner edges on the leg brackets to the table top base.


I don't want to run a long bead of weld at this point so that the whole frame doesn't start to warp.  So I continued with some 1 inch long welds along the sides for extra strength.  


And then closed up the inside corner joints.


Well, the base is done.  I guess I can try the legs and see how they fit.  I ran to the hardware store yesterday and got the bolts, nuts and washers I needed, with the exception of the nylon threaded lock nuts.. for some reason they didn't have any for the sizes I needed.  Ohh well, some lock-tight should do the trick.


Lookin good, right?!  Everything fits pretty good and is pretty well straight.  Pretty happy about this!

Now to fuse the legs together. I still need to cut to length the 2 pieces for this task.  I wanted wait until it was all together to make sure the length was accurate.  Two 17 1/4" pieces, coming right up.


Gotta admit, I'm getting pretty handy with the plasma cutter!  The cuts were nearly perfect.. the only thing that got me this time was when I switched from TIG to Plasma, I forget to switch the foot control switch off, so the plasma cutter would start weak and then just peter out.

So I have only enough time before my daughter gets up from her nap to weld in one of these leg.. 


See, looks like a table!  The few remaining things now left are to weld together the other pair of legs, cut up and drill  the 1" flat stock that will hold the front and back legs together and allow them to fold, cut the table top from the 1/4" plate I have left over, and weld it to the frame.  I might just be able to get this done in one more evening of work.